How To Change Your WordPress Login URL
The short answer is to install, activate, and configure the Better WP Security WordPress plugin.
What We're Doing
With Better WP Security, you'll be able to change:
- /wp-login.php to /login/
- /wp-admin/ to /admin/
- /wp-login.php?action=register to /register/
- Or to whatever slugs you choose in the plugin settings
Step By Step Instructions
You really should change your login URL (and by login URL I mean the URLs for logging in, registering, and administration). Here's how to do it:
Step 1: Take a Full Backup
Take a full backup, not just a database backup. Like all backups, verify it's completed and in your desired location before proceeding to the next step. You can take a full account backup from within cPanel.
Step 2: Install and Activate the Better WP Security plugin
At the recommendation of several WordPress gurus, I tried Better WP Security for this purpose alone (although it has a bunch of great features), and it worked like a charm right from the start.
Step 3: Setup the Better WP Security Plugin
Once the Better WP Security plugin is installed, follow these steps:
- Open the plugin's wp-admin options page.
- Follow the first 3 setup steps as shown in the screenshots below:
- Make your backup selection.
- Allow the plugin to change WordPress core files (read the warning first).
- Click the "Secure My Site From Basic Attacks" button.
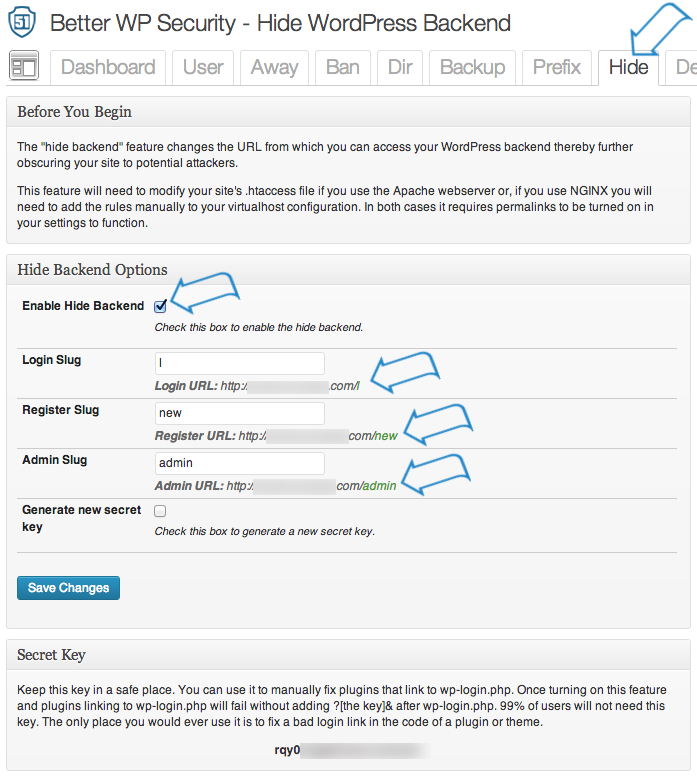
- Click the "Hide" tab.
- Check the "Enable Hide Backend" box.
- Enter your desired login, register, and admin slugs or leave them at the plugin's defaults of "login", "register", and "admin".
- Click "Save Changes".
- Don't forget your new URLs, especially the login URL! You might want to write them down somewhere until you get used to them. Or never need to remember the login URL if you use an auto-login tool like ManageWP (additional steps follow).
Screenshots of each step above are shown below:
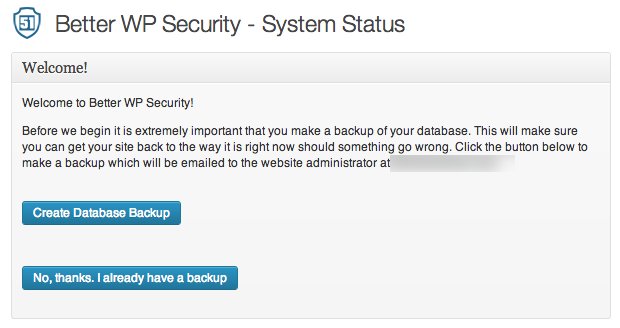
Initial Setup Page. Select the backup option you think best. (If you've already created a backup with ManageWP, you can skip this backup.)
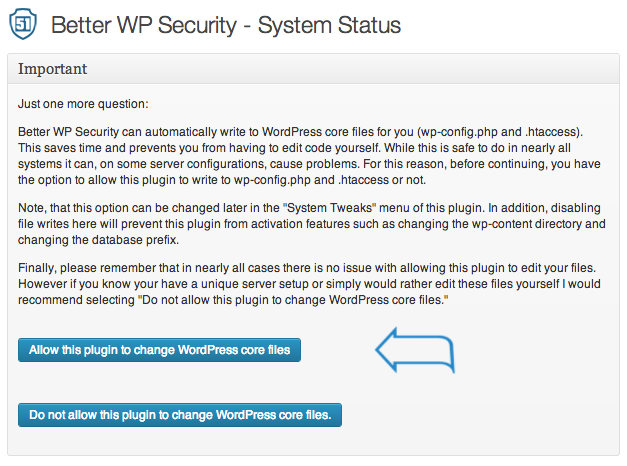
Setup step 2. Read the instructions and, in general, click to allow changing WordPress core files.
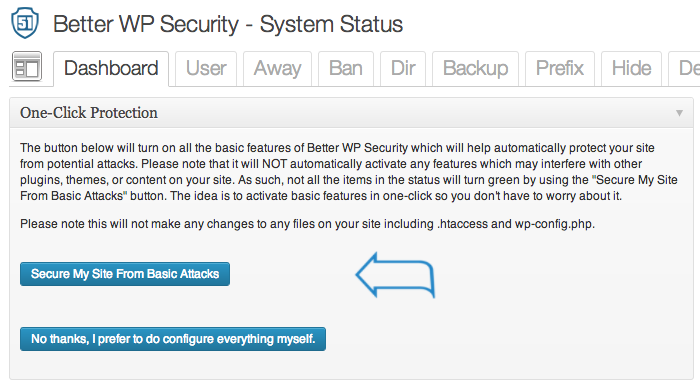
Setup step 3. In general, click the option to allow the plugin to activate its default security settings, since this plugin does more than just change the login URL.
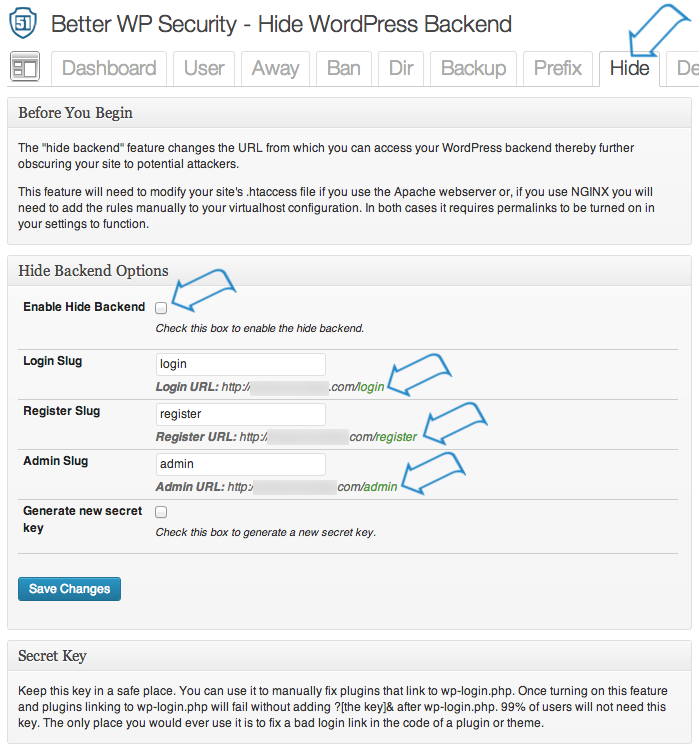
After clicking the "Hide" tab at the top, check the box to enable the feature. Change the text boxes as you desire. Then click "Save". (Don't worry; you won't get logged out upon saving.)