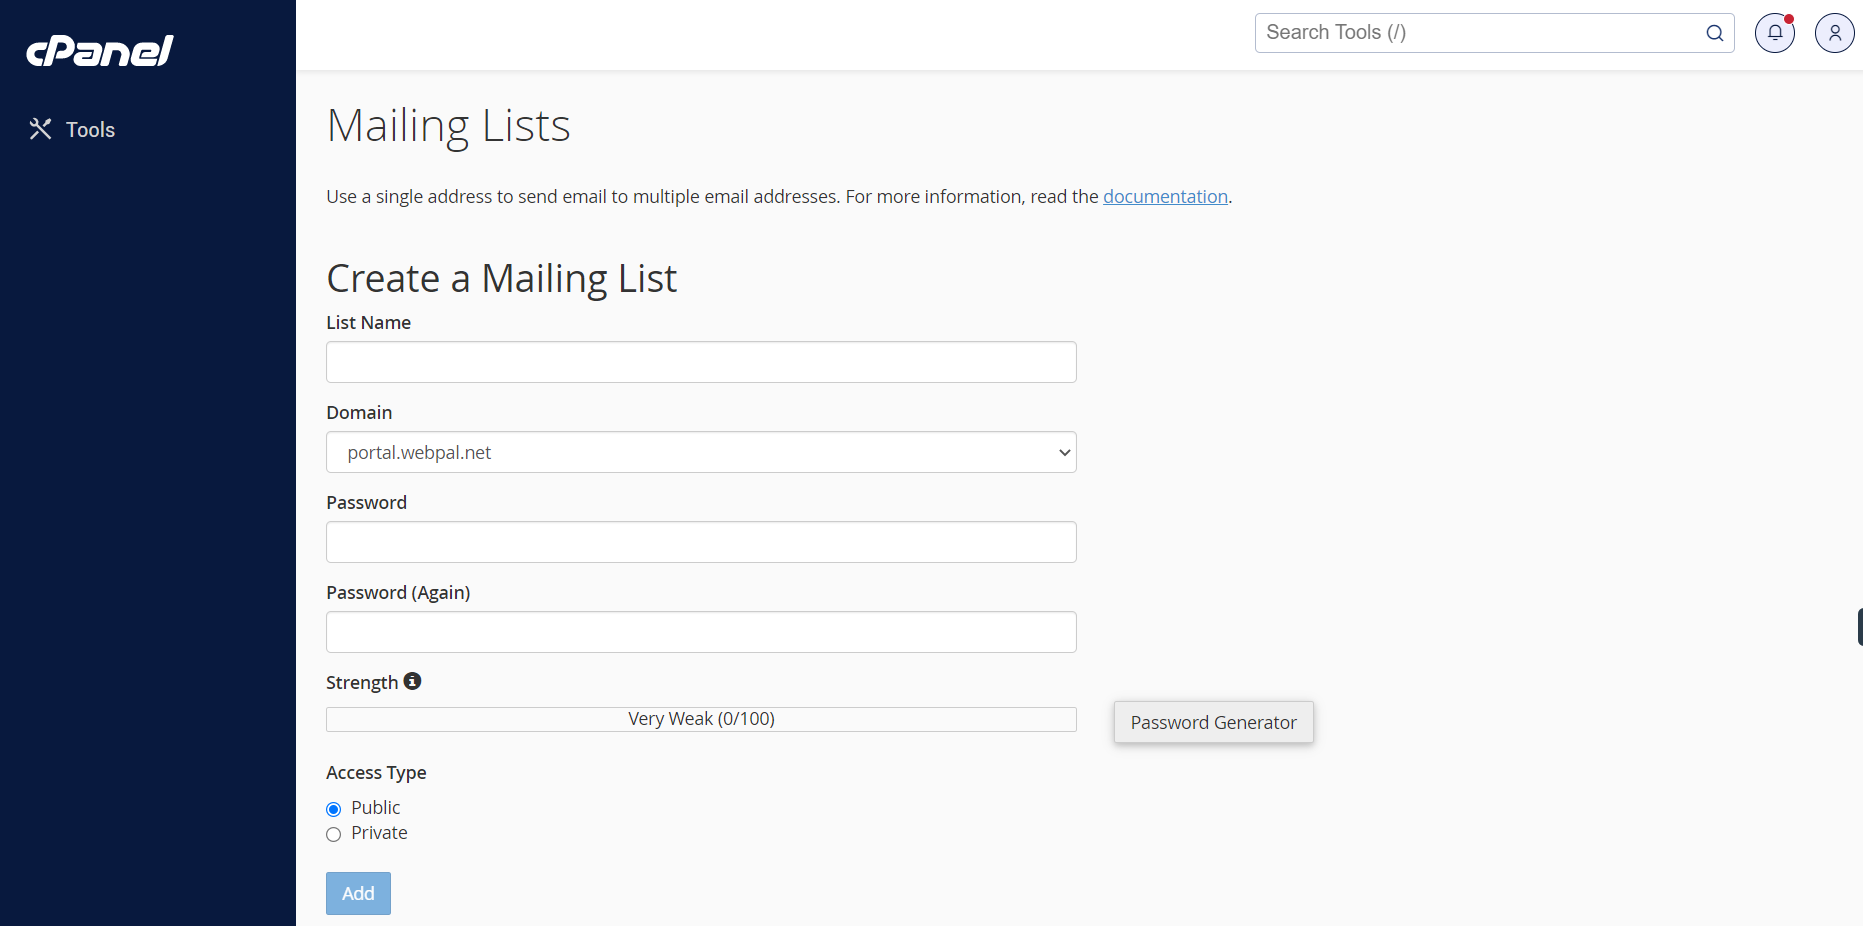
Creating a New List
You are welcome to have more than one mailing list with us, this allows you to have a "Staff" mailing list, where you can send a message out to all staff members, or you can have a Newsletter mailing list so that customers can subscribe to receive updates from you regarding products, pricing, and maybe even specials or promotions that you're offering.

To create a new list (even if you have already successfully done so in the past this section will still apply to you) perform the following:
- Choose a Username or Name for the list (i.e. staff), and put this in the List Name
- Next, select the domain you are going to add this to in the Domain selection box. You can skip this step if you only have 1 domain with our hosting services.
- Next create a password and enter it in the Password section. We suggest using the Password Generator so it creates a safe, hard to guess password. Instructions are at the bottom of this document, click here to jump right to them.
- Choose Access Type - If you choose Public then people external to your organization will be able to send emails to this list (not recommended if you intend to have customers on this list!). Similarly if you choose Private then only people within your organization can send email to this list.
Examples:
List Name public@example.com
List Type: Public
Who Can Email? Everyone! Meaning that I can use michael@cloud.webpal.net and send a message to public@example.com and it will send to everyone on the list
List Name private@example.com
List Type: Private
Who Can Email? Only people within the Organization. If I use michael@cloud.webpal.net to send a message to it I will receive a bounce back email indicating that the user doesn't exist. However, if I use michael@example.com then the email will go through no problem at all.
Public lists are generally used if you have say John and Sally setup to receive sales emails from your website, customers or partners then you could use sales@example.com and add in John and Sally, then you wouldn't be having one person getting the message(s), you'd have 2 or more people. These lists are definitely not intended to be used if you are sending emails to customers from this list, which should be a Private list. - Once you have set the information in Step 6, click on Add
- If successful you will receive the following notice on your screen:

- Click Go Back and you will be brought back to the first Mailing List Screen